Saturday, November 6, 2010

digital bor gauges

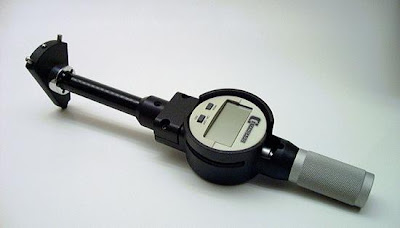
Picture of digital bor gauges

The newest models of Standard Gage digital electronic bore gages are manufactured in Switzerland by Tesa, the manufacturers of high-end Etalon and Interapid gages.

These digital bore gauges can be zero-set to a master for comparative readings and can also be used for absolute reading by presetting to a master, such as a setting ring. Setting rings are not included and must be purchased separately.

The minimum hold feature will allow you to rock the gauge head through the bore and the display will show the minimum bore size.

The .00005" (1µm) digital indicator makes this both an inch and metric bore gauge with SPC (RS-232) output. The gauge and its accessories come in a sturdy carrying case.

Replacement digital indicator

The manufacturer offers a one-year warranty against defects and malfunction. After that year is up, however, if your digital display acts up you will have no option but to replace the indicator which can be purchased separately. It is highly unlikely that anyone in the US will be able to perform repairs on these digital indicators.

  • Digital indicator has .00005" (1µm) resolution
  • Maximum permissible error = 5 µm
  • Repeatability = 2 µm
  • Hysteresis = 2 µm


Wednesday, June 23, 2010

Definition of Bore Gauges

What A Bore Gauge will Check?

Dial bore gauges allow rapid and accurate checking of bores for: size, ovality, taper and wear within a deep bore.

Simple Checks

To inspect a bore merely for out-of-roundness, taper and other variations of shape, or wear, without using a master, set the indicator to zero at one position in the bore and then take readings at other positions.

Checking Variation To a Known Size

The gauge can be set in a bore of known diameter, preferably a ring gauge of the size to be checked. With care, the gauge can be set by outside micrometers or by slip gauges in a holder. Remember that unlike a bore, micrometers and slip gauges have flat faces, and the setting must therefore be square to these faces.

Setting The Bore Gauges

If plus and minus readings are required, adjust the extension until the "minimum" reading occurs, roughly midway in the range of the dial indicator. Should the full plunger travel be required in one direction, adjust the extension until the indicator registers just at the beginning or end of its travel according to the direction required. Lock the extension securely with the nut. The indicator with its shroud can be adjusted on the body of the gauge if socket-head clamp screw "H" is loosened. Using this adjustment and the rotatable bezel of the indicator, the hands and main dial can be positioned wherever required within the range of movement.